
Get the Most Out of Your Canon 800d T7i SLR Camera and Have Full Control of Your Shooting

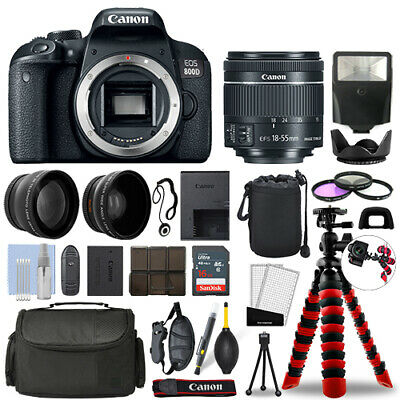
The Sleek & Advanced Canon’s entry-level Rebel DSLR TS7I series is a great durable camera that accommodates plenty for you to learn & grow your skills. It features a 24.2MP APS-C CMOS Sensor & a DIGIC 7 Image Processor for the best quality images with innovative qualities. It also offers a 3.0″ 1.04m-Dot Vari-Angle Touchscreen with Full HD 1080p Video Recording at 60 fps, 45-Point All Cross-Type Phase-Detect AF, Dual Pixel CMOS AF, & Up to 6 fps Shooting with Built-In Wi-Fi with NFC, Bluetooth. With the Canon EOS Rebel 800D Camera, you control the vibe.

Let’s talk about settings!
Now let’s dig a bit deeper and talk about what settings to use in different shooting scenarios. All it takes is a bit of devotion, passion, and you can master the art of photography if you really want to.
We suggest you use the T7i’s default settings and built-in help system if you’re starting. Go to Menu>Function Settings (yellow tab with a wrench)>Menu 4>Clear Settings>Clear All Camera Settings. Press the Set button on the back of the camera to confirm. This brings everything back to the camera’s default settings. Be sure to write down any special settings you’ve used before this so you can go back to them later on.
How to achieve a beautiful portrait?
Today we’re going to point out the easier ways to work the camera and get great shots. Your ideal portrait should draw attention to the person by creating a shallow depth of field (the distance over which the image appears in focus). This creates an easy out-of-focus background called bokeh. Here are two ways to achieve a beautiful portrait. Set your 18-55mm zoom lens to 55mm & zoom all the way in. A wide-angle setting, such as 18mm, might distort the person’s face.
Set the mode dial to the Portrait icon; this enables the camera to automatically set the exposure, blur the background slightly, and soften the skin and hair. By default, the camera is set to low-speed continuous shooting and Auto flash. If your subject is backlit, try the Backlight Control Scene Mode (under SCN). Press the Q button to turn off the flash if you’re in a setting where flash is prohibited. Set the camera to a single shot if you want to save space on your SD card.
Nighttime Photography
Now let’s talk about Nighttime Photography. A tripod or very stable mount for your camera opens truly does wonders & opens up a world of options for you, as you’ll be able to take advantage of slow shutter speeds for amazing long exposures, with streaks of light.
Turn the mode dial to the scene (SCN) mode. Scroll to Handheld Night Scene. Hold your camera steady, press the shutter button halfway to lock the focus, then gently squeeze the shutter button. Now Hold the button down until four images are captured. This option works best with static scenes/subjects since the camera merges the four shots in the camera. Make sure nothing moves because you might notice ghosting where the combined images don’t line up if they do. If you have anyone in your shot, ask them to stay very still until all four shots are captured. Also, the flash is set to off by default in this mode. To turn on the flash again, press the Q button. It will fire on the first shot only & your subject needs to stay still until the end of the four-shot sequence.
Next, set the mode dial to Av (aperture priority). Set the aperture (f-stop) to a higher number (around f/8) to get a broader depth of field (more of the image appears in focus). Then Set the ISO to between 100-400 to help minimize image noise (if possible). Check the corresponding shutter speed. If there are no moving subjects in your scene, the shutter speed can be as long as necessary. Alternatively, a long exposure of about 1/30thsecond or longer — creates a blur from moving objects such as car taillights for unusual and beautiful images. Next, use the self-timer to capture the image, then press the left arrow on the 4-way controller to open drive options. You can also use your smartphone and the Canon Camera Connect app or the optional remote control to trigger the shutter.
Here’s another tip:
Your best bet is to shoot in RAW or RAW + JPEG and use a software program like Affinity Photo or Adobe Photoshop to reduce noise in post-processing. If your exposure is 1 second or longer, enable the camera’s Long Exposure noise reduction (Auto or On) and, if your ISO is 1600 or above, set High ISO noise-reduction to Low. (See Menu>Shooting Menu 4.)
Landscape Photos
For Landscape Photos, Wide-angle lenses are the ideal option for natural vistas and even cityscapes. In general, you also want to get as much of the image to appear sharp. Sunny days are the best for colorful landscapes, but you can also capture amazing euphoric, moody photos in misty and foggy conditions, so don’t forget to try shoots in that weather as well. Set the Mode Dial to Landscape; the icon looks like two mountains and a cloud & it’s next to the Portrait icon. This delivers a broad depth of field (the image appears sharp from near to far) and intensifies blue and green colors. Zoom out to the widest setting on your lens (18mm for most kit lenses), focus, and breath & shoot!
One key feature!
One of the 800D’s key features is Canon’s new guided user interface, which uses easy-to-understand graphics and information to explain the effects of different camera settings. For example, when you’re using the Tv (Shutter Priority) mode, the screen shows a scale with slower, ‘flowing’ shutter speeds on the left and faster ‘frozen’ speeds on the right; as you turn the dial, a caption below indicates the situations where you might use the current speed.
We hope at Flidbe you enjoyed some of our blogs & tips for the Canon 800D T7I SLR. Don’t forget to check out all our other digital camera offers.
Quick Access to Our Previous and Next Blog
See our previous blog:
See our next blog:

An Excellent One-Stop Web Service Provider
Access to the Internet is now essential for the everyday job of every one of us. The Internet is among the most cutting-edge technologies and communication channels currently available. The Internet is nothing more than the conglomeration of countless websites that cover every imaginable facet of human existence.

The Story Of Your Business Success
The evolution of the web undergoes nearly constant change monthly, particularly for publishing platforms such as WordPress. This is not the only area in which non-coders get the opportunity to develop a website with all of its features. Some systems are dedicated to a single purpose and stand-alone, such as WordPress.com and Squarespace.

Moving & Packing Tips for Your Smoothest & Easiest Move
You don’t have to have a disastrous move when you pack up your life and move down the street or across the country. Learn how to pack boxes for moving, and you’ll settle into your new home in no time. Moving, like getting a tooth extracted or traveling a long distance through uninspiring landscapes, is one of those hardships practically everyone has to go through at one point or another.

The Future of ECommerce Shipping
When it comes to shipping, are you an e-commerce business owner that worries? You don’t have to deal with all of the delivery alternatives available. The method used to ship products is one of the most significant parts of operating an online retail store. After all, you want to ensure that your clients’ orders are delivered promptly and securely. You must have a dependable shipping software solution to handle your orders, shipments, and inventory effectively.
